Orchestration and Execution
Overview
Pipelines are new in 4.0. They let you arrange the built-in modules parameter, build, execute command, data transfer, data upload and message push as nodes of a workflow, run it with one click and follow every node and host in a live console. Compared with the fixed flow of application deployment, pipelines are a better fit for:
- multi-step, multi-host release and operations flows with dependencies between steps;
- flows that need input from the operator at run time (version, branch, feature switches);
- artifacts that must be distributed to many hosts followed by further commands;
- results that should be pushed to DingTalk / Feishu / WeCom, or sent as SMS / phone calls through Push Assistant.
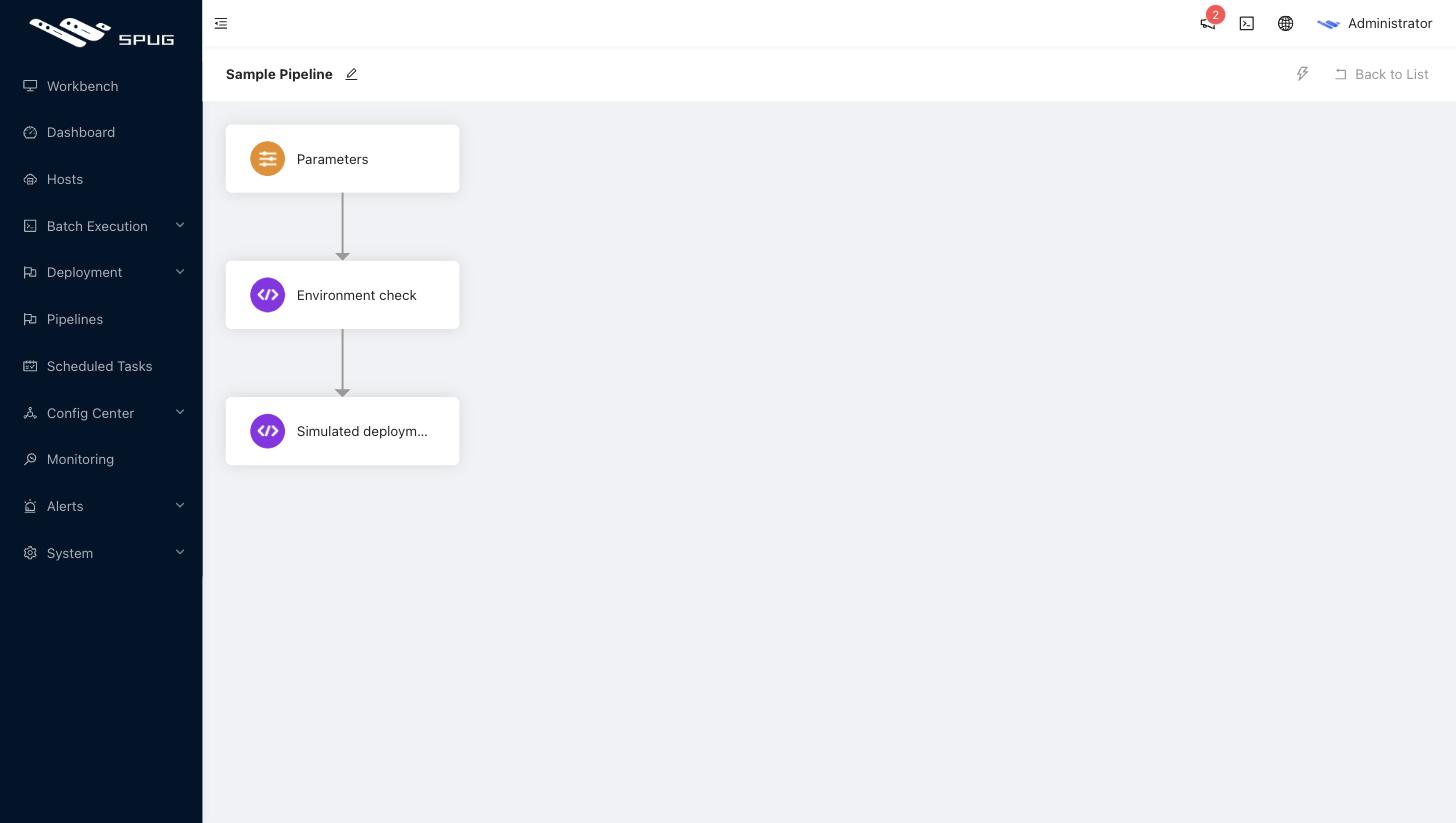
Creating a pipeline
- Click New on the
Pipelinespage to open the editor directly; the pipeline is called "New pipeline" by default, and the edit icon next to the title changes name / group / description. - The canvas is on the left. Click a node to open the Select Module / Module Config panel on the right; the
⋮menu of a node lets you add an upstream node, add a downstream node or delete the node. - Pick a built-in module for every node, fill in its settings and click Save.
- Click the Run button (lightning icon) in the top-right corner; the list page also has a Run action.

Nodes and conditions
Execution starts at the first node. Every node finishes as success or failure, and the condition of each downstream node decides whether it runs:
| Condition | Description |
|---|---|
| On upstream success | runs only after the upstream node succeeded (default) |
| On upstream failure | runs only when the upstream node failed; typical for failure notifications or rollbacks |
| Always | runs regardless of the upstream result; typical for clean-up and result notifications |
- The first node has no upstream, so its condition is ignored.
- A node may have several downstream nodes; all that match the condition run in parallel. Give each node only one upstream to avoid triggering it twice.
- Multi-host nodes (execute command, data transfer, data upload) run on the selected hosts in parallel and succeed only when every host succeeds.

Running and the console
When a pipeline contains a parameter node with dynamic parameters, a build node with a Git branch / tag chosen at run time, or a data upload node, a dialog asks for the values or files before the run starts.
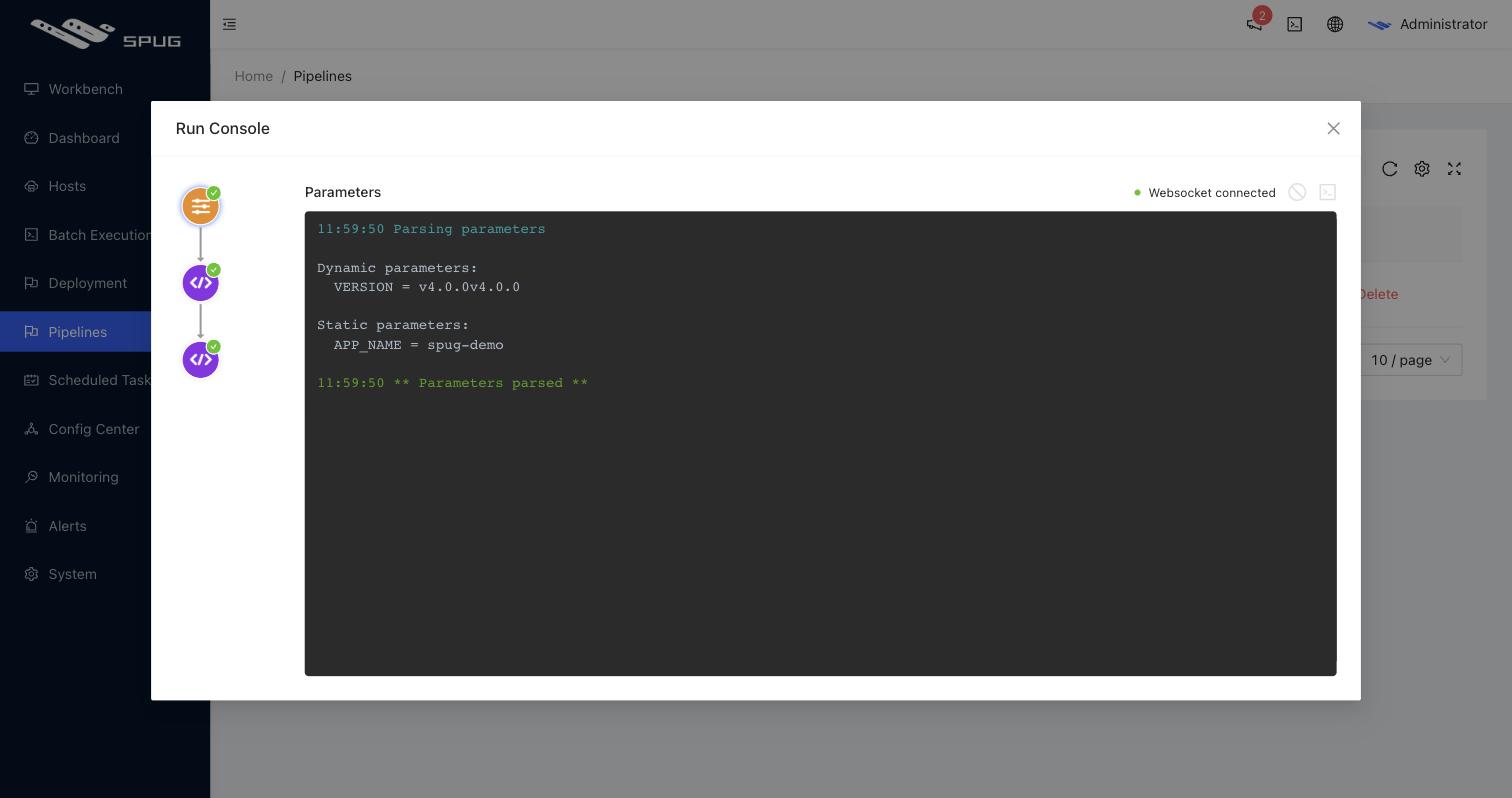
- The left side lists every node with its state (waiting, running, succeeded, failed); click a node to see the real-time output of each host.
- Running nodes can be terminated, which sends a termination signal to the hosts.
- Every run is stored as a history entry with an increasing sequence number.
Execution history
The Last run column of the pipeline list shows the state and time of the latest run. Click History in the actions column to see the runs of a pipeline:
- Each entry shows the sequence number, state (Running, Succeeded, Failed, Interrupted), trigger (Manual or Open API), who ran it, the start time and the duration.
- View opens the console and replays the final state and output of every node of that run; users allowed to delete pipelines can delete history entries.
- The latest 50 runs of each pipeline are kept; older entries and their console output are removed when a new run starts.
Variables
Variables are injected into node scripts as environment variables:
| Source | Variable | Description |
|---|---|---|
| Parameter node | _SPUG_<variable> | dynamic parameters (entered at run time) and static parameters (fixed values) |
| Build node | SPUG_SET_* | variables exported in the build command with the SPUG_SET_ prefix are passed to later nodes without the prefix |
| Build node | _spug_git_tag / _spug_git_commit | the Git tag / commit chosen at run time |
| Push nodes | $SPUG_PIPE_NAME, $SPUG_NODE_NAME, $SPUG_STATE_TEXT, $SPUG_DATETIME | pipeline name, node name, upstream state text and current time, available in push content only |
Example: export a version number in the build node for later command nodes:
# build command of the build node
mvn -q package
export SPUG_SET_JAR_VERSION=$(cat VERSION)
# a later execute command node
java -jar app-$JAR_VERSION.jar
See Node modules for the settings of every module.
Permissions
Pipeline permissions are under Roles / Feature permissions / Pipelines (view, new, edit, delete, run). The hosts selectable in nodes follow the host permissions of the role.